Posts Tagged photography

Exterior View, Ford Highland Park Plant, 30 March 1932; Object P.833.56894.1 / THF237509
When Ford Motor Company engineers developed the assembly line at the Highland Park Plant back in 1913, they were seeking to increase production volume in order to provide more automobiles to the general public at a reasonable cost, and in a reasonable time.
Move ahead more than 100 years to 2020, where the staff of The Henry Ford and the Benson Ford Research Center (BFRC) are operating a modern assembly line to digitize images and documents from our collections and make them available online.
By some estimates, The Henry Ford holds roughly 26 million 2D and 3D objects, with the majority of that total – some 25 million items – contained within the archival collections at the BFRC. Clearly, there’s a lot to move down our “assembly line”!
As is the case with auto assembly, there are a number of stations along our line, beginning with material selection, then material retrieval, cataloging, imaging, storage, import, export, and finally ending with online display. Improvements made to the speed and efficiency at each of these stations can lead to gains in the production rate of the entire line.
This graphic shows where Rapid Capture imaging fits into The Henry Ford's overall digitization process.
To bring that speed and efficiency to archival imaging, the BFRC uses a process we refer to as Rapid Capture digitization. Developed by several institutions as an approach to increasing the scale of digitization, Rapid Capture is part technology, part process, and part philosophy.
Technically, Rapid Capture is rather simple. The equipment consists of a copy stand, lighting, a digital single lens reflex (DSLR) camera, and a computer equipped with photo editing software.
Rapid Capture station.
The important feature of the camera is its full-frame sensor, which can create a 400-pixel-per-inch image of an item as large as 9 × 14 inches, allowing us to provide users with high-quality images for the majority of our archival materials, which can be easily viewed, downloaded, and used for presentations or reports.
At the click of the shutter button, the camera can record an entire image – perhaps an 8 × 10 photographic print – without the cycle time of a more traditional flatbed scanner. If you’ve used a digital camera or a camera phone to take personal photographs, then you know how quickly you can take tens or even hundreds of snapshots. The same holds true for Rapid Capture, with the limit on imaging rate being the safe and proper handling of the archival material, not the time spent waiting for the scanner to make a pass.
On certain projects, we are able to capture both sides of a photographic print in less than 60 seconds, translating to nearly 500 prints imaged in a single day. Our flatbed scanner can produce 10-12 images per hour, or both sides of just 48 prints per day. Starting with a single Rapid Capture workstation in February 2011 and now utilizing two workstations, we have produced nearly 100,000 production images since the launching the process.
Process, or efficiency in process, is also an important part of Rapid Capture. For example, since material handling is one of the keys to the speed of Rapid Capture, we work to select and schedule material in groups having similar sizes or formats and that are located together physically, such as the box of 8 × 10 photographic prints shown below.
8 x 10 photographs from our collection foldered within an archival box.
Another example occurs in the post-processing of images, which can also be done in a batch manner, including exposure correction, cropping, and derivative image creation. By using automated scripts, much of this work can be done unattended, and in the case of large batches, performed in the overnight hours.
Finally, Rapid Capture is in some ways a philosophy. Rapid Capture puts a premium on user access to large numbers of images, and in doing so forces trade-offs in areas such as perceived image quality and image resolution. An example of this trade-off can be seen in some of our Rapid Capture images, which appear slightly tilted, such as this image from the Detroit Publishing Company Collection.
Railway Station at Haines Corners, Catskill Mountains, New York, circa 1902; Object P.DPC.014510 / THF204908
Rather than spend additional time on each image to create a perfect alignment, we’ve chosen to spend that additional time producing more images, with the assumption that you, our users, would want to see more “stuff,” and can accept some imperfection.
A second compromise involves image resolution. While the camera can produce images sufficient for online viewing and use in presentations, the images may not be adequate for advertising or commercial publication. We’ve accepted that a certain number of items may need to be reimaged at some point for publication use, but that the potential rescanning effort is outweighed by the ability to both produce and store more lower-resolution images.
Our implementation of Rapid Capture has proven to be very successful. In nearly 10 years of operation, we’ve created a large number of images that meet our goals for quality, usefulness, production time, and cost. And, as we celebrate our #digitization100K milestone of 100,000 digitized objects on our Digital Collections, we can also point to the more than 38,500 objects that are illustrated using Rapid Capture images as another measure of that success.
Continue Reading
digital collections, by Brian Wilson, #Behind The Scenes @ The Henry Ford, #digitization100K, digitization, archives, photography, technology
My name is Jillian Ferraiuolo and I’m a Digital Imaging Specialist at The Henry Ford. In that role, I work with our institutional photographer in our Photo Studio, taking photographs of artifacts and preparing those for use in our Digital Collections. Today I’m going to share a bit about the challenges of photographing glass artifacts.
This graphic shows where photography fits into The Henry Ford's overall digitization process.
If you haven’t had a chance to check out our extensive studio and art glass collection (whether in person in the Museum or Village glass galleries, or online), I recommend you do so! We have pieces that range from teapots and cups to whimsical studio glass sculptures. Photographing these beautiful pieces of glass provides unique challenges.
The first task is to figure out the angles to shoot. Many of these are works of art, so figuring out the “front” and the “back” is difficult. Take the piece below, "Bubble Boy" by Richard Marquis, for example. It’s hard to tell what the best angle would be, so we take our best guess, and take more than one photo if we need to! Most of the time, we’ll look for a defining feature: say, a handle, or an area of the design that is most appealing, and start there.

Two views of “Bubble Boy” by Richard Marquis, 1988 / THF164207, THF164208
Often, the curator notes that one of these pieces is either historically significant or is important because of the artist that created it. In these cases, we take another step to capture more and create a rotating 360-degree image. We do this by (carefully!) placing the glass on a platform, rotating it by 20 degrees at a time, and taking 18 total photographs. This way we get a full picture of the piece from every possible angle! Take a look at an example below, or check out all the glass 360-degree views in our Digital Collections.
Untitled from Relationship Series by Richard Royal, 1997 / 360-degree view
Another tricky part of photographing glass is dealing with its reflective qualities. As glass is usually shiny, creating an environment in the studio where we can control reflections can be tricky and time-consuming. Usually we create a fully white space around the object—if we don’t, every light and tripod and piece of furniture will be reflected on the object’s surface. We accomplish this very creatively with large boards or cloth, or if the object is small enough, we can put it into a tent that will allow us to fully control the space and light around it.

Examples of the Photo Studio set up to photograph a glass spittoon.
Then once we have everything set up, we take the photos, clean up the backgrounds with the magic of Photoshop, and enter the images and their metadata into our collections database—then voila, you get to see the finished photos in our Digital Collections!
Spittoon, circa 1873 / THF168196
All that effort for a beautiful photo… of a spittoon.
Continue Reading
art, decorative arts, glass, digitization, #digitization100K, by Jillian Ferraiuolo, photography
Photo Studio Adventures: Favorite Artifacts I've Photographed
This graphic shows where photography fits into The Henry Ford's overall digitization process.
My name is Jillian Ferraiuolo and I’m a Digital Imaging Specialist at The Henry Ford. In that role, I work with our institutional photographer in our Photo Studio, taking photographs of artifacts and preparing those for use in our Digital Collections. As you might imagine, I get to work with many fascinating artifacts, and I’m going to share a couple of my favorites with you here.
Conservator Fran Faile holds up a detail on the Cognitive Dress as I photograph it.
I think the most interesting artifact I’ve photographed is the “Cognitive Dress,” Designed by IBM and Marchesa, 2016. Besides being a beautiful gown, it is strung with lights throughout the skirt that change color based off technology developed by IBM using their Watson AI. Because of the innovative nature of this dress, and our partnership with IBM, it was important that we thoroughly document it.
The dress in the studio getting ready for its close-up with curator Kristen Gallerneaux and conservators Fran Faile and Cuong Nguyen assisting.
Normally we capture five standard angles when we photograph clothing, but this one was a special case because we had to account for the lights on the dress, and the changing colors. In total, we took 27 images of the dress, showing different angles, the shifting colored lights on the dress, and details of the skirt and lighting technology.
THF167960
THF167966
THF167976
I enjoyed photographing this dress not only because it was a beautiful gown, but also because it was a challenge. To get the right exposure with the lights while keeping the dress lit up was tough, but that’s also where the handiness of Photoshop comes in. I was able to adjust after the fact and create a very nice finished product!
Here’s a quick look at some of the shots we got!
Another fun project we had was imaging the Jens Jensen landscape drawings that show the plans for the grounds of Henry and Clara Ford’s estate, Fair Lane. These drawings were so interesting to look through—they lay out the gardens and surrounding areas of the estate in such detail, they’re works of art. Who would’ve thought that an estate would have so many blueprints? There are 29 in total, varying from gardens to orchards and even to plans for a bird pool.
Landscape Architecture Drawing for Fair Lane, "A Planting Plan for section around service buildings," June 1920 / THF155896
Jens Jensen Landscape Architecture Drawing, "A General Plan of the Estate of Mr. Henry Ford, Dearborn, Michigan," 1915 / THF155910
One of the reasons why we had to photograph these prints in the Studio is because they are large, folded up into individual leather portfolios. Usually anything two-dimensional goes through our scanning or flat photography process in our Archives, but the nature of these prints did not allow for that. To get a good image of them they had to be unfolded, then carefully flattened with a large piece of glass while being imaged. The trickiest part is to make sure the print lays as flat as possible while ensuring there isn’t any glare off the glass from the lights in the studio.
At a glance, I’m sure you’d never guess that that’s how they were photographed!
Here is a look at all the prints and the box they’re stored in.
What interesting artifact will we be photographing next? Peek through the Photo Studio’s glass doors at the back of Henry Ford Museum of American Innovation on your next visit and find out!
Continue Reading
21st century, photography, fashion, drawings, digitization, by Jillian Ferraiuolo, #digitization100K, #Behind The Scenes @ The Henry Ford

Hiram Sibley & Co. Seed Box, Used in the C.W. Barnes Store, 1882-1888 / THF181542
Several million guests have seen a reproduction Sibley seed box, based on an original box in our collections, in the J.R. Jones General Store in Greenfield Village since 1994, when the box became part of the reinterpreted interior. Commercial seed sales of pre-packaged vegetable and flower seeds began in earnest during the 1860s, and by the mid-1880s, Hiram Sibley & Company advertised itself as the world’s largest seed company. That might be true. Sibley, who made his fortune as executive of the Western Union Telegraph Company, invested in farms and packing houses in several states and engaged in seed trade in several foreign countries. His entrepreneurial bent warranted more exploration, as did the details of the seed packets, all stowed carefully in the box in the General Store.
The reference photograph in our collections database for the original seed box showed a box with seed packets. The accession number, 29.1987.18.1, indicated that this was an early addition to The Henry Ford’s collections—the first number, 29, means that it was acquired in 1929. The second number indicates that it was in the 1,987th lot acquired that year, and the third number indicates that the box was the 18th item in the 29.1987 grouping. In fact, as research ultimately disclosed, our collections included the box, plus 108 original seed packets and a Sibley & Co. Seed catalog.
My need to know more started a chain reaction. First, this object had been in the collection for 90 years. It has known provenance: Accession records indicate that it was purchased with other items from a store in the tiny, rural, upstate New York community of Rock Stream. The Barnes family—Charles W. and then his son, Alonzo S.—operated the store. Alonzo died in 1929, which may have precipitated the sale. Our registrars researched and catalogued all parts of the set. We also acquired archival documents—a map of the town from the time the Barnes family operated the store and two postcards of the town—for our collections to add context around the seed box.
Main Street, Rock Stream, New York, 1908-1910 / THF146163
Filling in details about seed packets required further reconnaissance. This required removing the seed box from exhibit at the end of the 2019 Greenfield Village season. Our Exhibits team moved the reproduction box and the authentic seed packets it contained to our conservation labs. Conservation staff removed the packets, checked for damage, then cleaned and prepared the packets for digitization. In the meantime, Collections Management staff located the original box in collections storage and moved it to the conservation labs for cleaning.
Once the packets were cleaned, they were moved to our archives, where the packets were imaged. After the box was cleaned, Collections Management staff moved it to the photography studio. The individual seed packets, once imaged, also were moved to the photo studio. There, the packets rejoined the box, fitting into compartments spaced to accommodate “papers” as well as multiple-ounce “packets” of seeds. The final photograph above shows the rejoined box and original seeds – cabbage, carrot, cauliflower, eggplant, onion, pea, rutabaga, tomato, turnip, and other vegetables.
Some of the individual seed packets that were digitized. See them all in our Digital Collections.
After the photo session, the seeds returned to the reproduction box, the box was sealed with its Plexiglas top to protect them, and Exhibits staff returned the box with its contents to the General Store in Greenfield Village.
It is important to note that the investigation, relocation, cleaning, digitizing, photography, and cataloging all occurred between January and March 2020, before COVID-19 closed the museum and delayed the opening of Greenfield Village. During that closure, between March 15 and July 9, the digitized records became part of numerous blogs written to meet the needs of patrons seeking information about food sources, vegetable gardening, food security—and about tomatoes!
It may seem difficult to justify the amount of time required from so many people to digitize one box and its many seed packets during the process. Each staff member involved in the process had to juggle numerous competing projects to make time to attend to the box and its packets. However, their work created invaluable digital resources that have already enhanced several of our blog posts. We may never know how many people were inspired to plant their own vegetable garden during a year of uncertainty partially, or wholly, because of “How Does Your Vegetable Garden Grow?,” or who just had to have a BLT after reading “Multiple Takes on Tomatoes.”
This is what digitization can do, and this is the effort that it takes. We all do it in the spirit of life-long learning.
Continue Reading
1880s, 19th century, Michigan, Dearborn, New York, research, photography, Greenfield Village buildings, digitization, digital collections, COVID 19 impact, collections care, by Debra A. Reid, #digitization100K, #Behind The Scenes @ The Henry Ford
Digitizing Our Collection of Hallmark Keepsake Ornaments: A Collection Management Perspective
Collection management staff play a crucial role in The Henry Ford's digitization process. We not only find and pull objects from their storage locations and move them to the photo studio, we also unpack or assemble objects if needed, assist the photographer with setup, repack the objects, and return them to storage after being photographed. We also track the locations of objects in the collections database as they are moved from place to place.
This graphic of our digitization process shows where collection management fits in.
Most movements are pretty straightforward and involve only minimal handling, but some objects give us a greater challenge. Sometimes it is the sheer quantity of objects that creates a challenge in coordinating and streamlining the digitization process.
One example of this type of work is our recently acquired Hallmark ornament collection. Over 6,600 ornaments were acquired, and we initially set out to digitize them all, with photography completed by the end of 2020. (Note that this goal has since been disrupted, like so many things, by the worldwide coronavirus pandemic.) With this many ornaments, it became clear that a plan was needed to maximize efficiency and that it was way too much work for the present staff to accomplish due to other job duties, so contract employees were hired to work solely on the project.
We streamlined the process as much as possible, but there were still quite a few steps.
Pallets of incoming unprocessed ornaments in our storage building.
After the ornaments are catalogued by our registrars, collection management staff move the ornaments from the processing area to the Photo Studio, making sure all items are securely packed so no damage occurs during the journey. Because our campus is so large, this involves moving the objects from one building to another.
Catalogued ornaments awaiting delivery to the Photo Studio.
Upon arrival in the studio, the ornament product packages are removed from the storage cartons and then the ornaments are unpacked from their product packages. Care is taken in opening the packages, and the items are carefully removed as to not tear the boxes, damage the ornament, or lose any small pieces. The ornaments are then sorted to keep similarly sized ones together, so the photo setup doesn’t need to be changed between each photograph. Glass or shiny ornaments usually require different lighting, so these are kept in their own batch as well.
The ornaments are readied ahead of the photo shoot to easily move through the process, allowing a large number per day to be shot. We don’t want to get slowed down by taking time in between each shot to unpack the next item.
Ornaments getting prepared to be photographed.
Ornaments with their packages and accession number tags ready for photography.
Ornaments lined up on a cart, ready to be photographed.
Photographing the ornaments.
Assisting with the photography setup is also part of the job: placing the ornaments on the table, removing them after they’re photographed, making sure all parts are included in the shot, and assisting the photographer as needed.
After the photographer is done, we wrap the ornament in clean new tissue paper and carefully place it back into its product package. The product packages are then placed in new, clean archival storage boxes, sorted by year. For permanent storage, the bubble wrap that was included in the original packaging is removed, as it does not contain a stable plastic and may break down and harm the objects.
Photographed ornaments being sorted before being boxed up for storage.
Since this a very large collection, it would take up a large amount of shelf space in storage. To save space, we stack the completed cartons on a pallet. When the pallet is full, it is then shrink wrapped to keep all the cartons in place during movement to their storage location.
Palletized Boxes shrink wrapped to keep everything in place. within the pallet in the future.")
Diagram of location of boxes to easily locate boxes (and the individual ornaments they contain) within the pallet in the future.
Barcoded boxes ready to be palletized.
At each step of the process, from cataloging to the final storage location, the location of each ornament is tracked in our collection management database [Axiell’s EMu]. We update the location field each time we move an artifact. With 6,600 ornaments in the collection, that’s a lot to keep track of—so we streamline this step as well.
A holder location is created in EMu and a barcode is generated for each storage box and pallet used. Each time we move a box to a pallet, we scan its barcode and the one on the pallet, and all ornaments in that box get their location updated automatically in our database. Then when we move the pallet, we scan its barcode and the barcode of its storage location, and all ornaments in all the boxes on the pallet get their locations updated. This saves a lot of time and is much more efficient then updating each object individually each time.
Due to the worldwide COVID-19 pandemic, our digitization priorities have shifted—but we were still able to digitize more than 2,000 of the Hallmark ornaments before we had to stop. You can check out some curator highlights from the collection in our Expert Set, or browse them all in our Digital Collections.
| The Henry Ford is facing unprecedented financial challenges due to the impact of our 16-week closure and reduced operations. We need your help in securing our future. Love the Henry Ford? Please support all that we treasure—including our digitization program. Longtime supporters of The Henry Ford will match your donation dollar for dollar, so your contribution will have double the impact. |
Hallmark, Miniature Moments, Henry Ford Museum, photography, digitization, COVID 19 impact, collections care, by Victoria Morris, #digitization100K, #Behind The Scenes @ The Henry Ford

THF151617
Just before the official dedication of his museum and historical village in 1929, Henry Ford decided he wanted a tintype studio added to the village. Ford’s staff worked feverishly to construct and furnish this building in one day! It was designed to look like a small tintype photographic studio from the 1870s and 1880s. Last minute details, including curtains hastily brought from the home of Ford’s photographer and hung at the windows, helped complete the look.
The Greenfield Village Tintype Studio has three rooms:
- A dressing room or “primping” room where customers got ready for their picture
- The studio or “operating room,” originally equipped with head rests (to hold people’s heads still so the picture wouldn’t come out blurry), posing chairs, cameras, and a painted backdrop. Large windows provided maximum light for the photographer.
- The darkroom for preparing and developing the tintypes

Ford’s staff built this tintype studio in one day—just in time for the rainy dedication of Greenfield Village on October 21, 1929. THF139188
Tintypes, the popular “instant photographs” of the mid-1800s, could be produced in a matter of minutes at a price the average American could afford. This quick, affordable process gave more people than ever before the chance to have a real likeness of themselves.
Though tintypes became less popular as new and better forms of photography replaced them, traveling tintypists found work at country fairs, summer resorts and other vacation spots as late as the 1930s. One such tintypist was Charles Tremear, who eventually gave up photography and went to work for Ford Motor Company in 1909. When Henry Ford heard that Tremear had been the “last wandering tintypist in America,” he transferred him to Greenfield Village.
Charles Tremear, the “last wandering tintypist in America,” ran the Greenfield Village Tintype Studio from 1929-1943. THF132794
Charles Tremear ran the Greenfield Village Tintype Studio from 1929 until his death in 1943. The studio was a popular destination. Tremear produced more than 40,000 tintypes during his tenure, including many of celebrities. Joe Louis, Walt Disney, and Henry Ford numbered among the famous people who posed for tintype portraits in Greenfield Village.
Though tintypes are no longer made in the Greenfield Village Tintype Studio, it's still a great place to learn more about the tintype process and practice some poses. Selfies are welcome!
20th century, Michigan, Dearborn, photography, Greenfield Village buildings, Greenfield Village

When Jenny Chandler photographed these Brooklyn children playing games about 1900, she also unwittingly provided us with a “cameo” image of herself. The photograph includes her shadow, slightly bent over her camera as she takes the shot. THF 38025
In 1890, 25-year-old Jenny Young Chandler suddenly found herself a widow with a two-month-old baby to provide for. This heart-rending personal loss would take her on an unexpected path--one as a photojournalist and feature writer for the New York Herald, capturing life in Brooklyn, New York and vicinity. Over the next three decades, Chandler’s sensitive, insightful photography would depict people from all walks of life and the world in which they lived--a legacy preserved in over 800 glass plate negatives.
Jenny Chandler was born in 1865 in New Jersey to William Young and Mary Lewis Young. An only child, Jenny was raised by her father and stepmother, Sarah Bennett Young. The family moved to Brooklyn, New York, when Jenny was six, so her father could work as the city editor for the New York Sun newspaper. Jenny followed the normal “career path” for a young lady at that time, marrying William G. Chandler on April 25, 1888. The groom, a neighbor, worked as a sales representative for a picture frame manufacturer. Jenny and William welcomed a son, William Young Chandler, on October 12, 1890. Two months later, Jenny’s husband died of typhoid fever. Chandler unexpectedly needed to earn a living for herself and her child.
When Jenny Chandler embarked on her career, photographs were made by lugging a heavy camera, glass plate negatives and tripod. Understanding how the photo chemicals worked and how light and camera lenses interacted proved to be an exacting task. While photography was growing in popularity as a hobby for young women whose families could afford the equipment, as a profession, it was still considered a male domain. Yet Jenny Chandler mastered the technical details of camera and chemicals, then used her sensitivity and insight as a professional photojournalist to create evocative images of the world around her.
Jenny Chandler’s photographs have an immediacy—a “you are there” quality. She had a remarkable talent for portraying on film the lives of people of diverse economic and ethnic backgrounds. Chandler captured well-off Brooklyn girls and boys playing games, the exuberance of families enjoying the beach at Coney Island, the well-mannered curiosity of students on a museum visit, young girls bent over their sewing tasks, scruffy boys hanging out at the beach, children gathering tomatoes, a fisherman mending his net, shipwrights making wooden boats, and Norwegian immigrant women laboring at their farm work.
In 1922, at the age of 56, Jenny Young Chandler died of a heart ailment. For nearly 10 years, her photographic legacy quietly remained in her Brooklyn home. The subsequent owner of the house, Betty R.K. Pierce--recognizing its importance--contacted Henry Ford hoping “to have Mrs. Chandler’s work preserved in some way.” Mrs. Pierce had read about Henry Ford’s museum and historical village, and thought the photographs particularly related to Ford’s collections. In May 1932, five large boxes containing the carefully packed 800 glass negatives were on their way to Dearborn.
The result of this donation is an amazing document of early 20th century life.
Cynthia Read Miller, former curator, photography & prints, and Jeanine Head Miller, curator of domestic life at The Henry Ford.
Brooklyn and its environs offered Jenny Chandler a varied palette of urban and rural scenes, wealthy and impoverished people, and daily work life and leisure experiences. Below are a few selections from her remarkable collection of photographs.
Coney Island’s beaches and amusement parks offered cooling breezes and leisure opportunities to New York City area residents. THF38292

Girls learn to cook at a trade school. THF38041
Girls visit a children’s museum in Brooklyn, 1900-1910. THF38128
A family enjoys an outing in Brooklyn’s Prospect Park, about 1905. THF 38192
A photograph of residents in their backyard - a rare “behind the scenes” glimpse of everyday life. THF38085
Clearing streets of snow. THF38073

“Tomboy of Darby Patch, Nellie punching bag.” In “The Patch,” a down-at-the-heels part of Brooklyn, the majority of residents were working class Irish immigrants. THF38251
A gypsy family enjoys an outdoor meal. THF241184
Boat Builders, New York, 1890-1915. THF38018
Children in front of a Gowanus Canal house, Brooklyn, New York. Gowanus Canal was a busy - and polluted - domestic shipping canal. THF38009
Gathering radishes in Ridgewood. Ridgewood - a neighborhood that straddled the Queens/Brooklyn boundary - remained largely rural until about 1900. Buildings in the background attest to the increasing urbanization of the area. THF38392
Norwegian immigrant women laboring at their farm work, about 1900. THF38397
It was so difficult to choose only a few of Jenny Chandler’s photographs! You can enjoy hundreds more of her images in our digital collections.
20th century, 19th century, New York, communication, women's history, photography, photographs, by Jeanine Head Miller, by Cynthia Read Miller

The Megalethoscope during treatment in the lab.
The Megalethoscope is one of thousands of objects from The Henry Ford’s Collections Storage Building (CSB) that is being conserved, digitized, and rehoused thanks to a ‘Museums for America Collections Stewardship’ grant from the Institute of Museums and Library Services (IMLS), received in October 2017. Heading behind the scenes, this blog will explain the process that an artifact moves through from conservation to photography—and eventually, becoming viewable on Digital Collections.
Conservation Treatment
Once an artifact is selected, tagged, and inventoried, it is given a preliminary cleaning with a vacuum and transported into the Conservation Lab.
(Left) Photo of how the Megalethoscope was found in storage; (Center) The instruction panel that shows how the Megalethoscope works; (Right) The Megalethoscope mounted correctly on its stand.
The top panels on the Megalethoscope before and after it was cleaned and waxed.
Prior to cleaning, a small spot was tested to determine the best method and materials to use. A mild detergent, diluted in distilled water did the best cleaning job without damaging the wood. The cleaning solution was gently rubbed on the wood surfaces with swabs to remove all of the dirt and grime, and then the surface was cleared with distilled water to remove soap residue. To bring back the shine of the wood finish, furniture wax was applied and buffed.
Years of storage on its end had caused the joints of the Megalethoscope’s viewer to separate (highlighted in red). Damaged areas were repaired removing the old, dried-up glue, and replacing it with fresh glue.
Large shrinkage cracks had developed in the two side panels that serve as light reflectors, and in the back panel that covers a large pane of glass. Shrinkage cracks develop when wood expands and contracts because temperature and humidity levels fluctuate too much.
Since the cracks were big enough to see through (approximately 1/8th inch wide) thin strips of Japanese tissue paper were soaked with a reversible adhesive, then dried, to fill each of the cracks. As each strip of tissue was compacted into the cracks, the adhesive was activated with solvent. This caused the dry paper to adhere to the edges of the crack and create a bridge. This fill was smoothed down flush with the rest of the wood panel, providing an even surface that could be in-painted to match the adjoining wood panels.
Using Japanese tissue to fill shrinkage cracks.
Watercolor and acrylic paints were used on the paper fills to hide the repairs and to paint in the large scratches and abrasions that covered the body of the Megalethoscope. To give the painted areas the same shine as the wood finish, a topcoat of acrylic gloss medium was applied.
(Left) In-painting the paper filled cracks; (Right) Paper fills after they were painted (in green).
To finish the treatment, the glass and mirror pieces of the Megalethoscope were cleaned with a solution of ethanol and distilled water, then wiped with microfiber cloths to prevent streaking. Any metal parts were cleaned with a mild solvent to remove small areas of corrosion and then waxed and buffed them to bring back their shine.
The Megalethoscope (Left) before and (Right) after conservation treatment.
Investigating Megalethoscope Slides
During treatment, an original photographic slide left inside of the Megalethoscope was discovered. This led to additional investigation. The slide depicted is of the Ponte dei Sospiri in Venice (the Bridge of Sighs). We wondered if there were more of these slides in the collection and after checking our collections database, found a box labeled “Megalethoscope Slides” in the Benson Ford Research Center (BFRC). The contents of the box were not catalogued, so we decided we needed to go to the Archives to see for ourselves!
When the box was brought to the Reading Room at the BFRC, we opened the box and found 21 slides, all in good condition! Many of the slides were photographs of Italy and Paris, plus a handful depicting interiors.
(Top) The Ponte dei Sospiri slide with handwritten inscription (Bottom) inside the Megalethoscope after it was taken out of storage.
Megalethoscope slides are large, multi-layered assemblies. Each slide consists of an albumen photographic image with pin pricks matching the areas where there is a light source or reflection (ex. an illuminated cityscape). Behind it are layers of colored tissue or cellophane and sometimes extra imagery when lit from behind; finally, there is a backing of a thinner, translucent canvas. All of this is stretched over a curved wooden frame. The curve creates a stereo view of the image which encompasses the viewer’s sight lines when they place their head into the Megalethoscope, much the way today’s virtual reality goggles work. Light is directed onto the slide to create different effects.
Cross section of a Megalethoscope slide. (Image courtesy of The American Institute for Conservation & Artistic Works, Photographic Materials Group Journal, Topics in Photographic Preservation 1999, Vol. 8, Art.5 (pp.23-30).
The slide that was found with the Megalethoscope in storage did not have any color effects, so we were excited to find that the majority of the slides in our archives had variations in color and optical illusions. The slides were moved to the conservation lab, where their surfaces were gently vacuumed. A smoke sponge removed any remaining dust and dirt. A few of the slides had small punctures or tears to the canvas, but since they were stable, we decided to not repair them at the present. We were thrilled to be able to reunite the slides with the Megalethoscope and have a fully functioning artifact!
(Top Left & Right) In "St. Mark's Square” you can see how people appear when light is applied to the image.
Photographing the Megalethoscope
The Megalethoscope on a cart for ease of movement during photography.
There are many steps that artifacts go through to be digitized and made available online, especially for objects as complex as the Megalethoscope. After the slides were conserved and cataloged, they were brought to the photography studio. For 3-D artifacts like the Megalethoscope, photography typically includes an image of the front, the back, and each side, if necessary. Photos serve as a reference material for historical researchers, and they document the condition of the artifact at that time.
The slides needed to be photographed in two ways: as they appeared in normal light, and as they would be seen through the Megalethoscope. Our senior photographer Rudy Ruzicska came up with a very clever arrangement to recreate this effect by placing two sets of milk crates with a sheet of Plexiglas suspended between them. He placed lights directly under and at an acute angle above the Plexiglas. The slides were placed in the middle of the Plexiglas with black paper border around the edges to prevent any light glare.

Light arrangement for photography of Megalethoscope slides. (Left) Rudy shooting with his custom set-up during the dark shot of the “St. Mark’s Square” slide; (Right) A closer view of the set-up.
The Megalethoscope images were then photographed under normal (“daytime”) light to document their appearance, and with their “nighttime” illumination effect by turning off the studio lights. The first time we saw the images illuminated in the dark, we all gasped – they became so vibrant and magical! 
A selection of the final images, with color and effects as they would have been seen inside the Megalethoscope.
The Megalethoscope was re-housed in a specially designed box which will store the unit and its base together safely, along with all of the slides. It was then moved to permanent storage in the Main Storage Building (MSB), as have most of the artifacts that we have worked on during the IMLS grant.
Thank you for joining me on this behind-the-scenes journey of an artifact from storage, to conservation, and through to digitization. I hope you enjoyed the ride!
Alicia Halligan is an IMLS Conservation Specialist at The Henry Ford
photography, IMLS grant, digitization, conservation, collections care, by Alicia Halligan, #Behind The Scenes @ The Henry Ford
The Henry Ford was recently recognized by WXYZ as one of the most Instagrammable spots in metro Detroit. If you’re always striving for that perfect Instagram post, here are a few tips and tricks I’ve learned in the Photography Studio at the Henry Ford Museum of American Innovation.
First, composition is key. Make sure to take a look around you as you compose your shot—what do you want to include? Sometimes an interesting angle, or an object in the foreground, can change your picture drastically. Make sure to walk around a bit before you snap your shot, or take multiples, and see which one you like best.
Take, for instance, this image I took of the water tower. By keeping it in the background, and other things in the foreground, it changes the photo to a view you might not see right away.
Similarly, going for a different angle can make for an interesting photo, especially when it’s something like Thomas Edison’s Menlo Park lab. Most people see its profile while walking by, and don’t look back when they’re exiting, but just seeing it from another perspective makes it look like an entirely different building.
Another thing to keep in mind is lighting, especially if you’re outside in Greenfield Village. On a sunny day, you want to make sure the sun is at your back, and if you’re taking photos of people, make sure it’s not in their eyes. On a gloomy day, always make sure to play around with the saturation and brightness/contrast before you post your picture. These little things can go a long way and can turn the grayest of photos a bit more vibrant!

An overcast day at the Roundhouse can still have a pop of color.
For larger subjects, it comes back to angles. If you’re having a hard time fitting everything in the frame, take a couple steps back, or turn your focus to the details. Sometimes the most interesting photos come from looking at something a little more closely.


And finally, lighting and exposure are important things to take into account when you’re going for the perfect shot. Though cell phones don’t allow as much control over exposure as cameras do, there’s still a lot that can be done. Take, for instance, these photos of the McDonald’s sign over by Lamy’s. By adjusting the exposure, we get a much more dynamic photo.
Hopefully some of these tips will help you out the next time you’re wandering about the museum or village. What’s your favorite place to take photos here at The Henry Ford? Show us! Use #THFPhoto and show off your work.
Jillian Ferraiuolo is Digital Imaging Specialist at The Henry Ford.
Michigan, Dearborn, photography, photographs, Henry Ford Museum, Greenfield Village, by Jillian Ferraiuolo
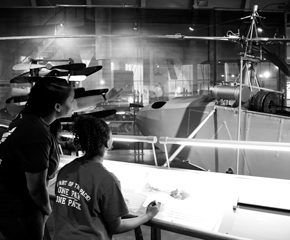
Have you ever wondered how we photograph quilts at The Henry Ford? While the answer is probably no, you might be surprised to find out that it is quite a process. Most quilts are quite large, ranging from 7ft x 4ft to even 9ft x 5ft. With that being said, our photo studio in the museum only has a ceiling that is 10ft tall, but to get an accurate picture of the quilt we would need the camera to be pointing at the quilt at a 90-degree angle. How do we accomplish that in a room that’s only 10 ft tall? We find higher ground!
Since our studio is on the back wall of the museum, we need to be somewhere elevated, but relatively nearby so we aren’t hauling our equipment all over the place. So, the Highland Park Engine is our answer. We mount the camera on the top railing of the stairs closest to the entrance to Conservation.


Then, with the help of 2-3 people, we lay the quilts on a large 10 x 10 wooden board that has a layer of muslin cloth on it (to protect the quilts and stop them from sliding down the board), We hoist the quilt board up onto stands to hold it in place at about a 60-degree angle which allows us to angle the camera to shoot straight at the quilt, giving us the correct perspective as if it were lying flat.
Here are a few examples of the finished images that go online on our Digital Collections website.

Looking at them, you wouldn’t think that they were photographed any other way than lying down, right? That’s the magic of photography - with a little bit of resourcefulness and ingenuity added in.
You can view all the quilts from our collection that we’ve photographed on our Digital Collections here.
Jillian Ferraiuolo is Digital Imaging Specialist at The Henry Ford.
Henry Ford Museum, quilts, photography, digitization, collections care, by Jillian Ferraiuolo, #Behind The Scenes @ The Henry Ford